Integra, the last generation of SAF Tehnika outdoor microwave radios, is equipped with Gigabit Ethernet SFP ports and usually has an optical transceiver with LC connectors installed. Thus, LC-LC type optical patch cables are often used to connect these radios to networking equipment or to other Integra radios in case of 2+0 setup.
This paper will address connectivity challenges sometimes met by engineers and provide suggestions to avoid possible installation problems. Before you install the microwave radio system, please check:
- Whether LC-LC Optical Patch cable you are intended to use has labels or marks on both optical cores (wires) at both ends of the cable. Only one of both cores may be marked, it is acceptable as well;
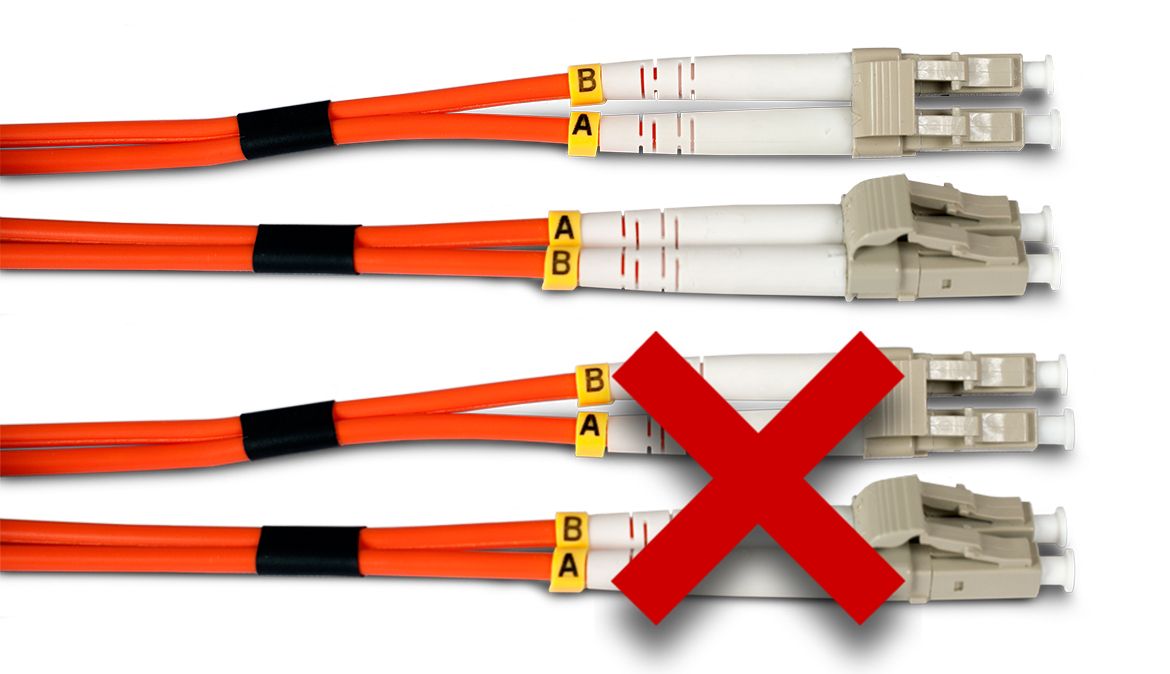
- Location of labels at both ends of the cable. If you place Optical connectors parallel next to each other, then marks must be interchanged on both ends of cable, as shown in Picture. 1: “B” is connected to “A” and vice versa.
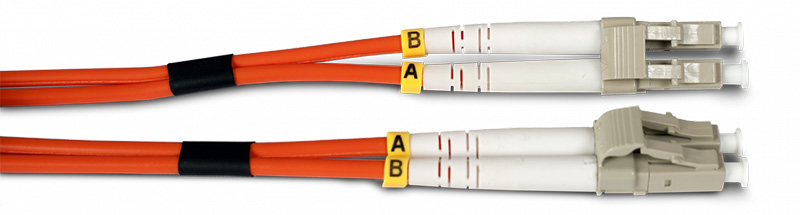
Picture 1. Correctly assembled, “cross” LC-LC Optical Cable
Assembly with interchanged cores or so-called "cross" assembly ensures that Optical Tx ports of both units are connected to Rx ports of the equipment on the other end. This is a mandatory prerequisite to establish Ethernet connection between both units. Your LC-LC cables should always look like shown in Picture 1. Conversely, Picture 2 shows LC-LC Optical Patch cable, which is, assembled as “straight”, where marks are the same on same side connectors at both ends. Cable assembled “straight” way has no use with any SAF sold equipment; therefore, we call this assembly “wrong”.
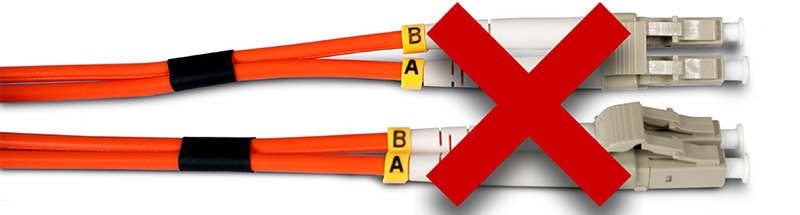
Picture 2. Wrong assembled, “straight” LC-LC Optical Cable
If for any reason you find out your cable looks like in Picture 2, i.e., is assembled “straight” way, you can simply reassemble it yourself in a few minutes.
Please take following steps, at one end of the cable only:
- Remove the small plastic clip, which holds both connectors together.
- Swap positions of connectors.
- Place the plastic clip back in its location.
Your LC-LC optical cable should look like it is shown in Picture 1 after these actions.
Please perform aforementioned actions carefully. Otherwise, plastic clip can be broken.
Please take into account, some vendors place labels or marks only on one of both connectors. In that case, labelled connectors must be opposite at both ends.